Building a RAID Array with USB Drives
If you asked what I was thinking about at any given moment, there’s a decent chance I’d say RAID, USB drives, and how confusing it all is. This past week I built a RAID array using USB drives after seeing a post by Darko.
This is a walkthrough of how I set it up, which RAID level I went with, and what I learned along the way.
Backup… RAID?
Redundant Array of Independent Disks or RAID, is a technology that allows multiple hard drives or solid-state drives to be combined into a single unit to improve performance, provide data redundancy, or both.
RAID has always been an interesting topic to me, one I wish I had paid more attention to in computer science class, largely because of how practical it can be for data centers or anyone running on-prem.
RAID has several levels (0 through 6). I considered two when embarking on this project: RAID 1 and RAID 5.
RAID 1
RAID 1 appealed to me because it is primarily focused on creating a redundant copy of data. I run a media server, and one more backup never hurts.
Worth noting: RAID 1 does not use parity or striping, so if both drives fail, the data is gone and there is no way to reconstruct it.
Some limitations that made it less viable for me:
- Capacity: only 50% of total capacity is usable. With two 1 TB USB sticks, you get 1 TB, not 2.
- Cost: this project was supposed to be quick and fun. Buying five 1 TB USB drives starts to feel less like a fun weekend project, and storage prices haven’t exactly been friendly.
- Write performance is only as fast as each individual drive.
RAID 5
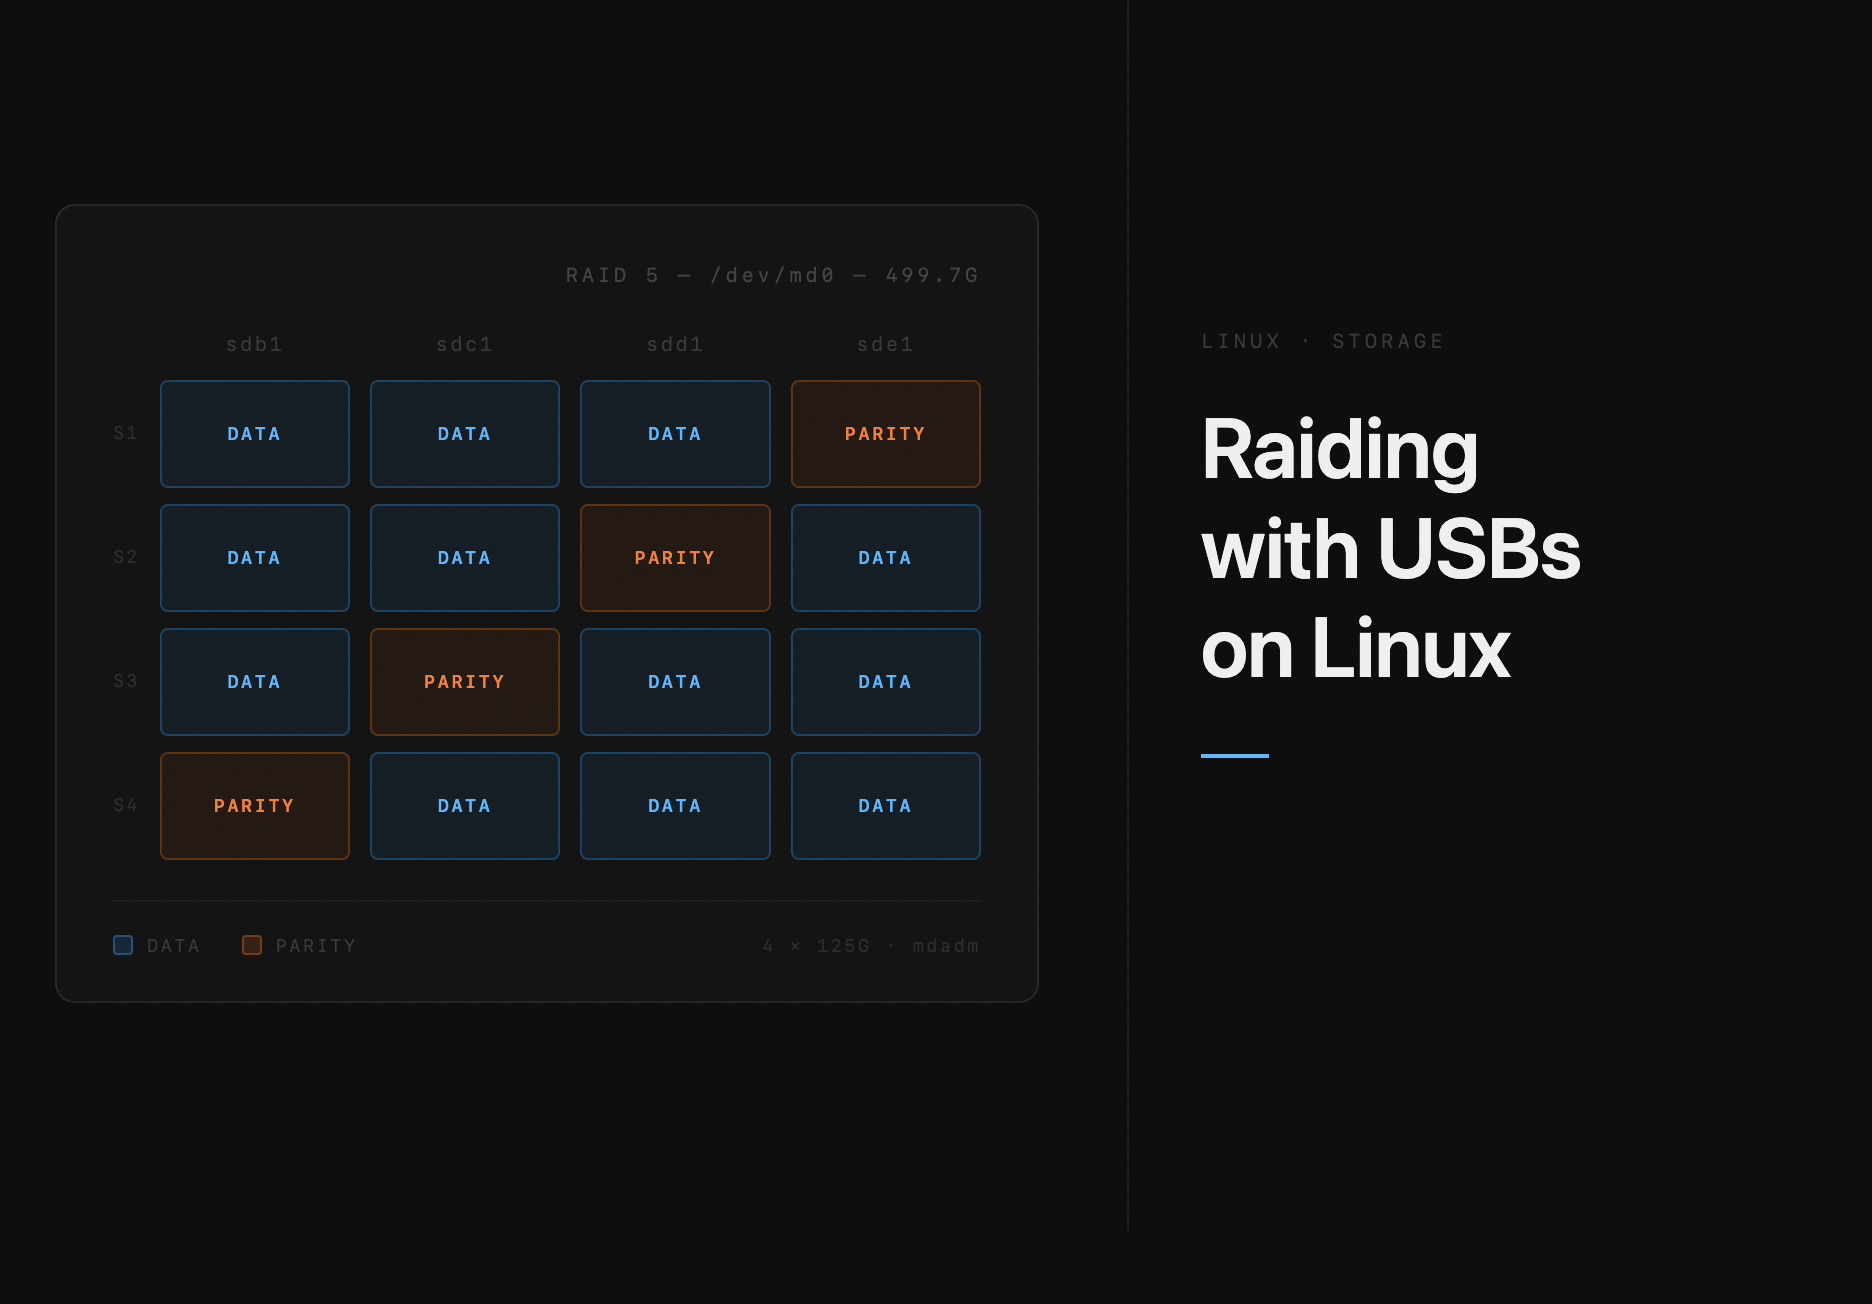
RAID 5 was a lot more appealing. It combines block-level striping with distributed parity, which ensures that if a single drive fails, reads can still be serviced using the parity data spread across the remaining drives.
Additionally, if one drive fails it can be rebuilt using the distributed parity,though the rebuild process can take a while.
Fun fact
While writing this, one of the drives actually failed :)
You can think of Raid5’s fault tolerance as something like this:
Unlike RAID 1, the total usable space is (N−1), so i you had six drives(128GB ) five would be usable and you get 512 GiB capacity while one is dedicated for parity.
Assembling the array was fairly straightforward. Unfortunately I am not made of gold, and hardware RAID controllers could run anywhere from 50 to 400(USD)+.
Thankfully, Linux has a software implementation of this via a command-line utility called mdadm:
mdadm --create /dev/md0 --level=5 --raid-devices=5 /dev/sd[abcde]
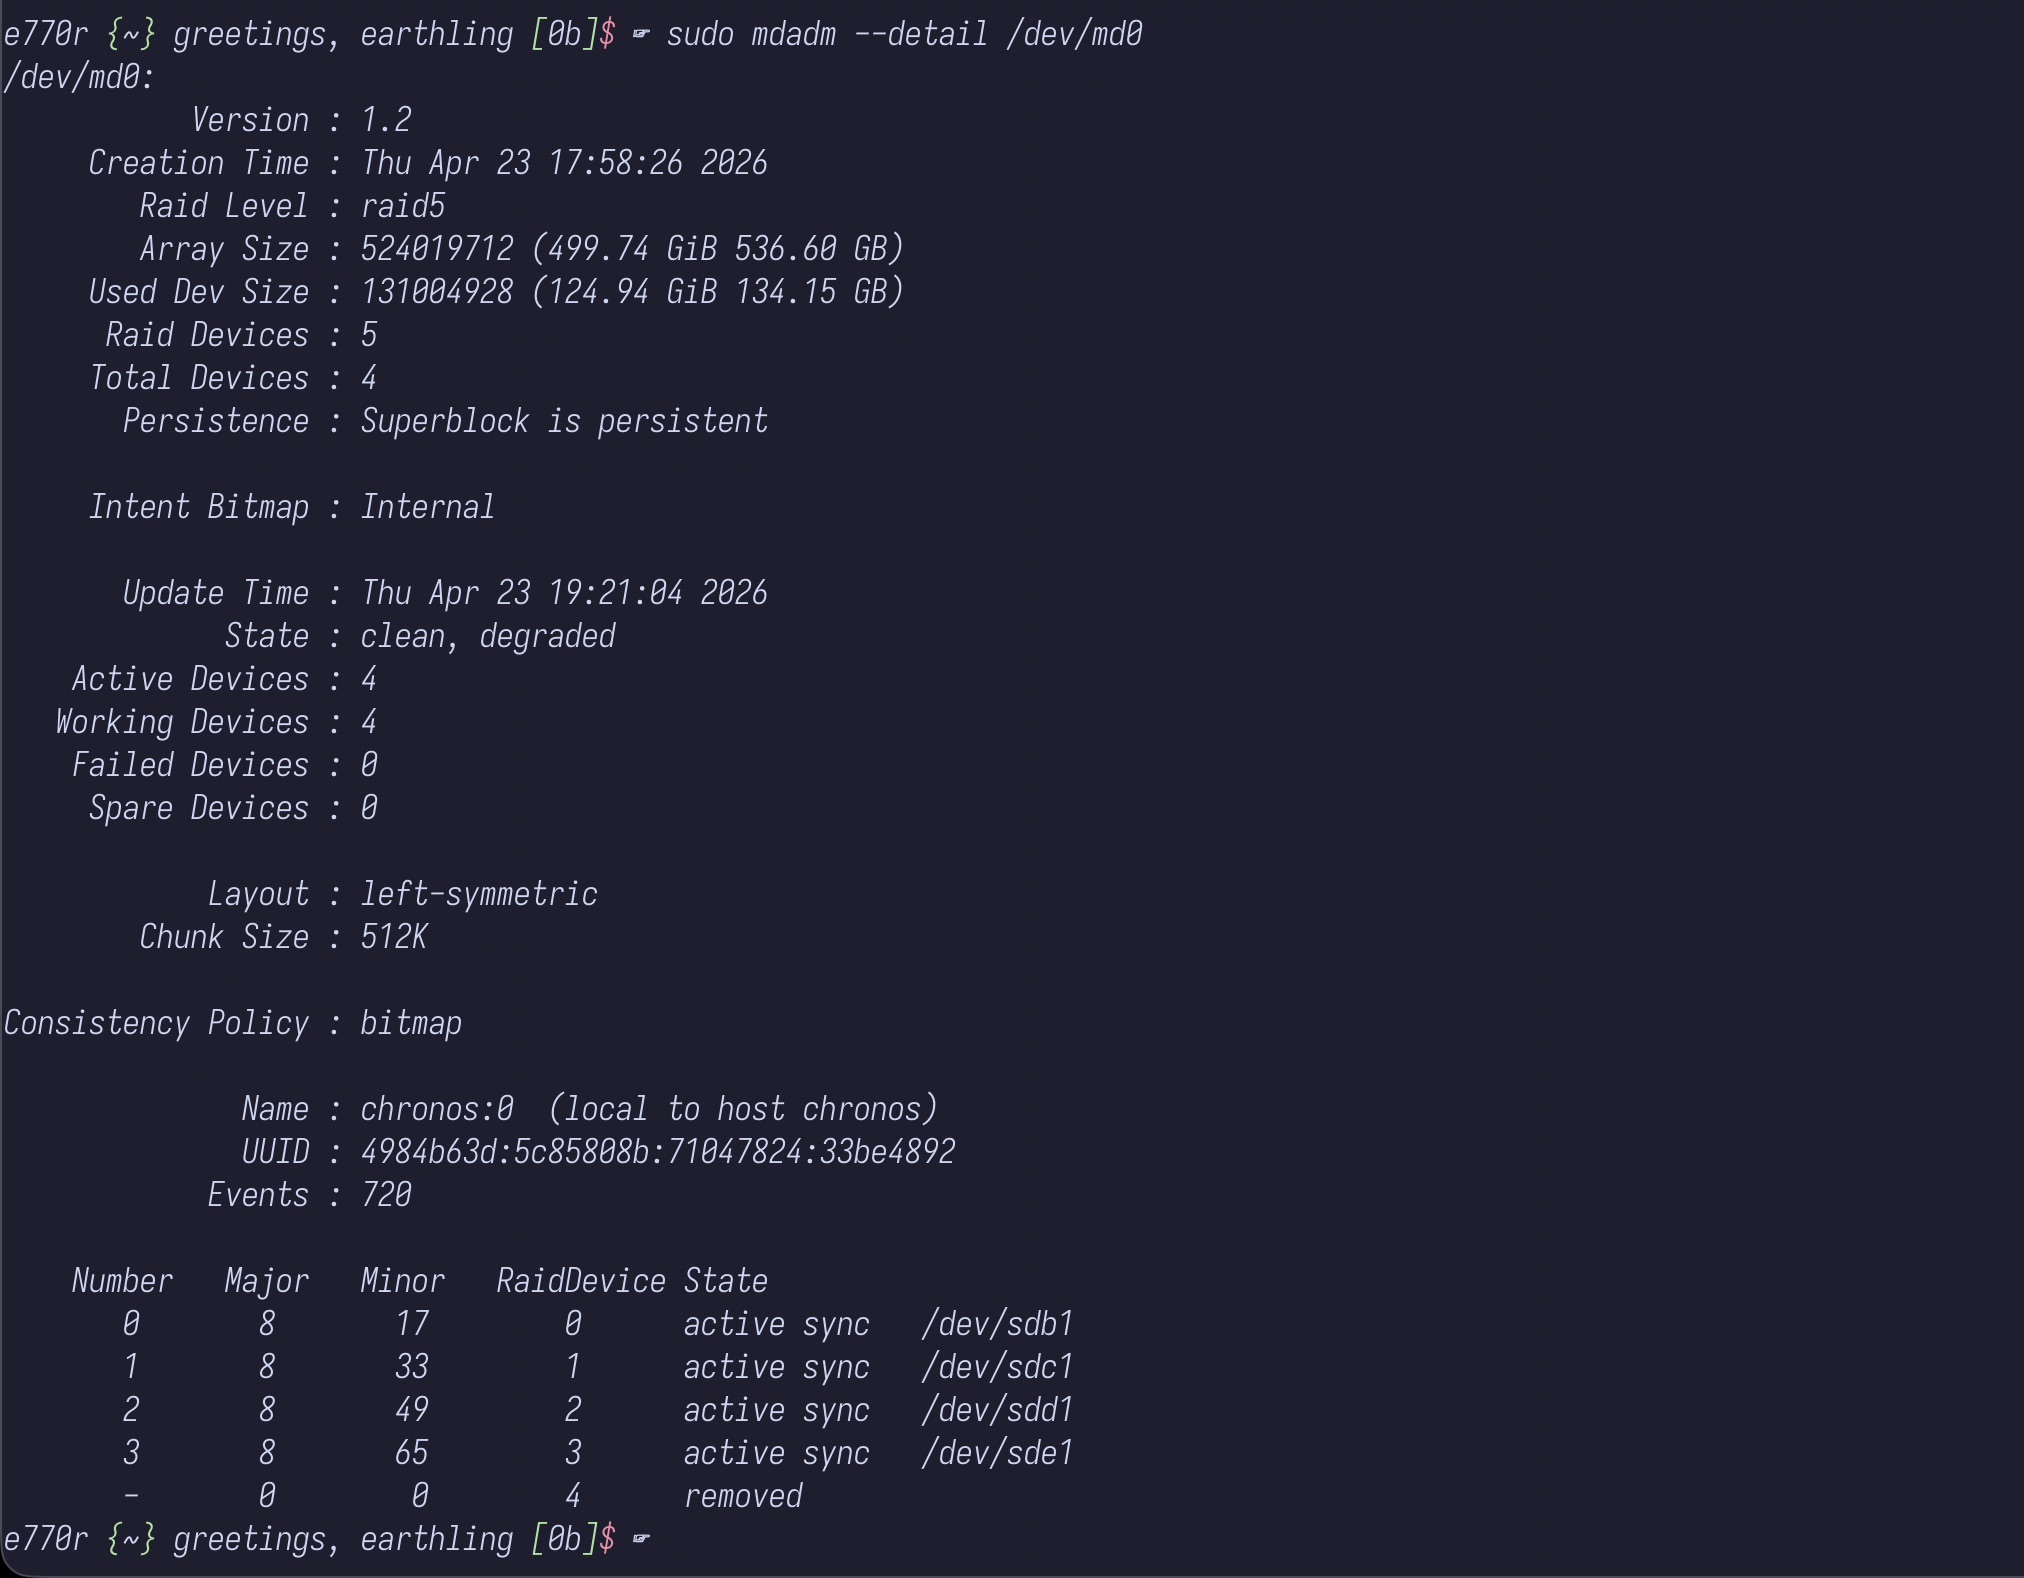
checking on my drives it looked something like this
 sudo mdadm --detail /dev/md0
/dev/md0:
           Version : 1.2
     Creation Time : Mon Apr 27 00:33:56 2026
        Raid Level : raid5
        Array Size : 393010176 (374.80 GiB 402.44 GB)
     Used Dev Size : 131003392 (124.93 GiB 134.15 GB)
      Raid Devices : 4
     Total Devices : 4
       Persistence : Superblock is persistent

     Intent Bitmap : Internal

       Update Time : Mon Apr 27 08:46:12 2026
             State : clean
    Active Devices : 4
   Working Devices : 4
    Failed Devices : 0
     Spare Devices : 0

            Layout : left-symmetric
        Chunk Size : 512K

Consistency Policy : bitmap

              Name : somehost:0  (local to host somehost)
              UUID : b7434282:0d0a0d25:138beec6:7b594ed3
            Events : 3844

    Number   Major   Minor   RaidDevice State
       0       8       17        0      active sync   /dev/sdb1
       1       8       33        1      active sync   /dev/sdc1
       2       8       49        2      active sync   /dev/sdd1
       4       8       65        3      active sync   /dev/sde1
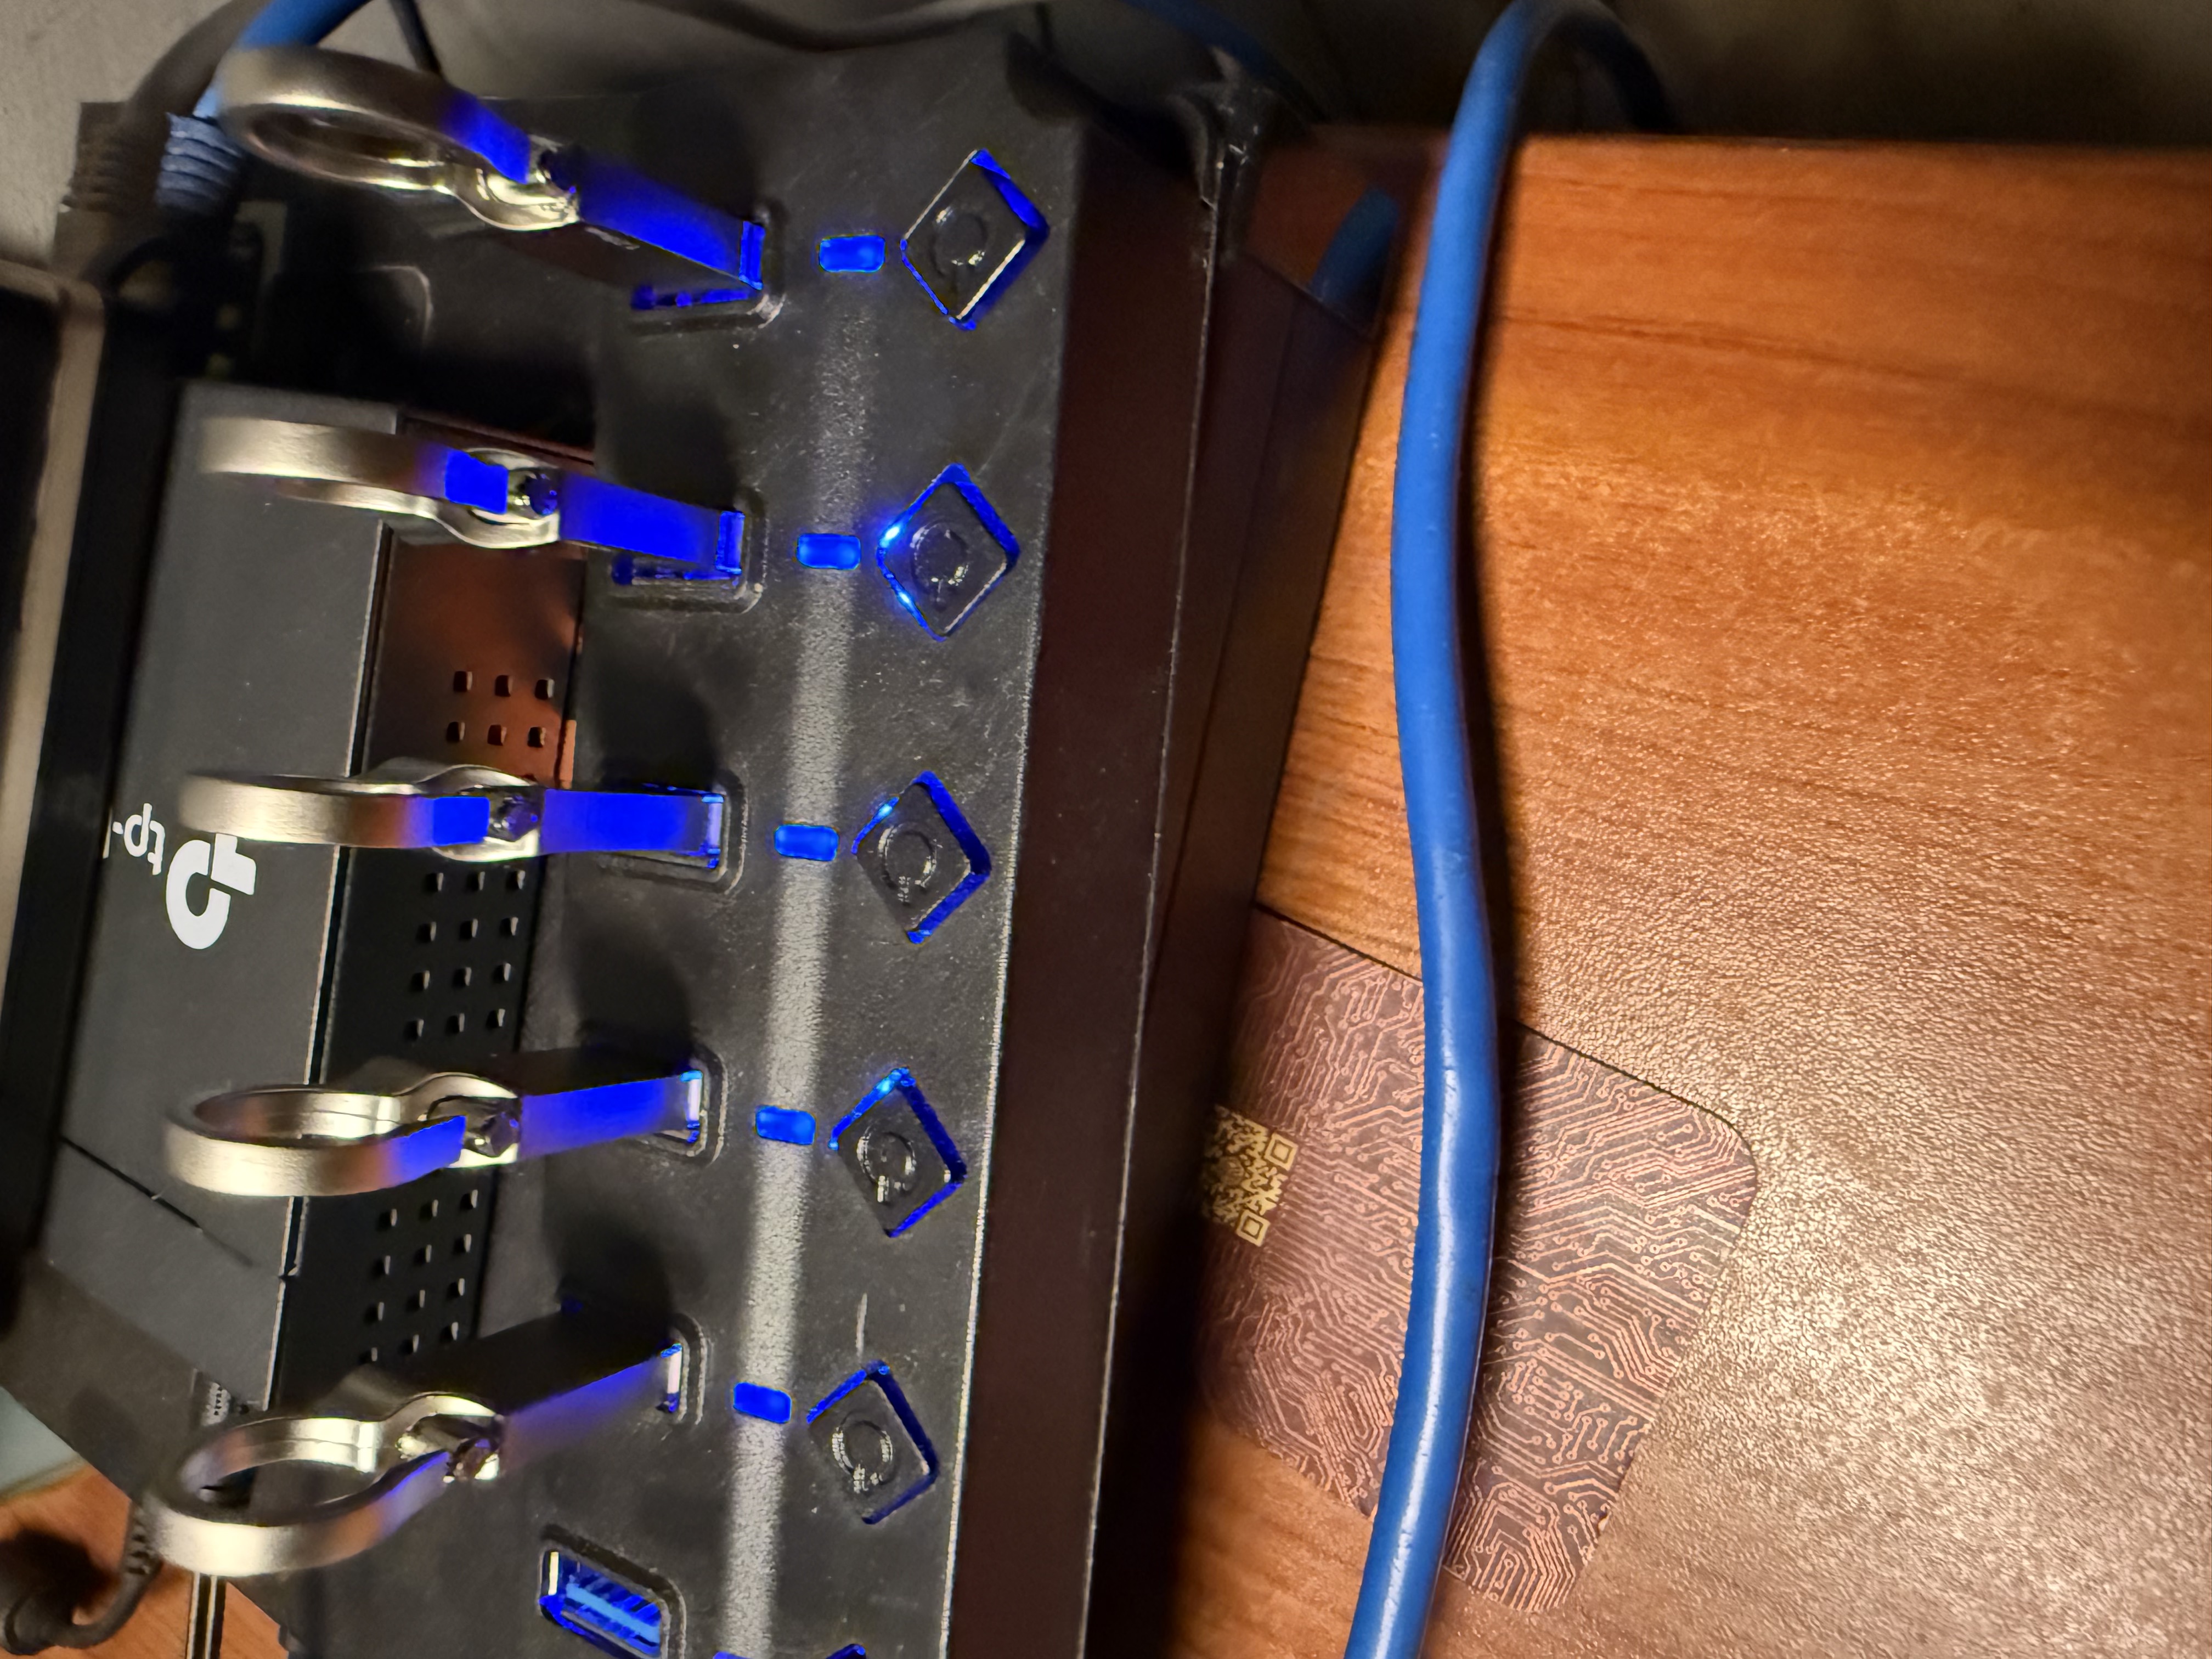
physically my array ended up looking something like this:
Closing thoughts
RAID is an incredible technology, and this short experiemnt really allowed me to explore and get a better sense of how to reason about data availability requirments on small scale.
In the future i would attempt a more serious version of this for backups and probably write a follow up post.
Until then happy hacking.
Notes
Striping the technique of splitting data across drives at the block level
Notes
- Hamming code is the error-correcting math behind how parity bits work.
- Worth reading Digital Ocean’s tutorial on RAID